Inspected. Printed. Certified.
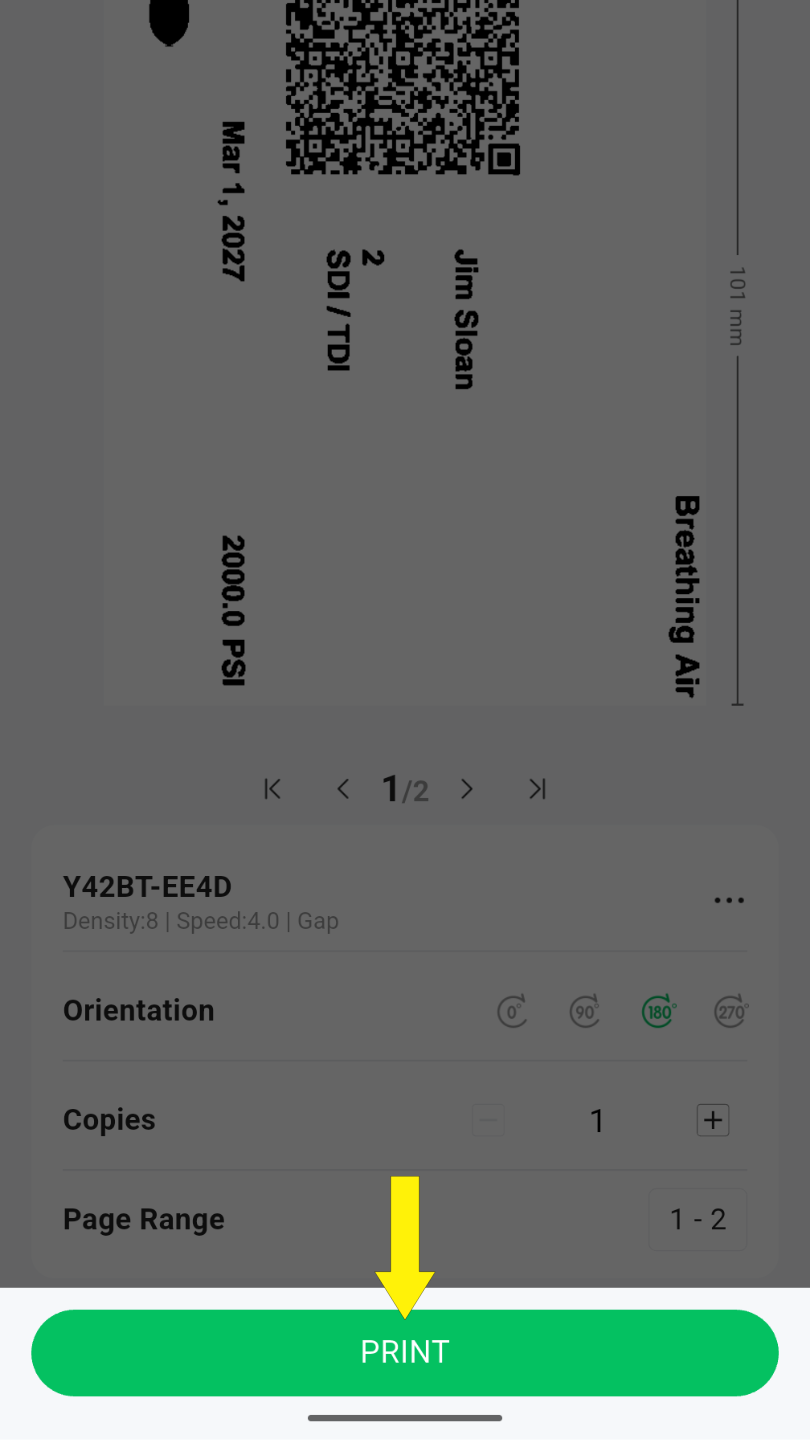
The Cylindex app is compatible with thermal label printers. Generate industry-accepted labels the moment your inspection is complete.
Our Visual Inspection App works with almost any Bluetooth-enabled thermal label printer. The app generates a label document that you export to the printer. If you’ve already have a bluetooth capable printer, you’re set.
We tested this workflow on our preferrred printer: the SVANTTO Bluetooth Thermal Label Printer, 4×6 Shipping Printer. The instructions below are written specifically for it. If you’re using a different printer, follow your printer’s own pairing and printing steps — the core process will be the similar, but menus and app names will differ.
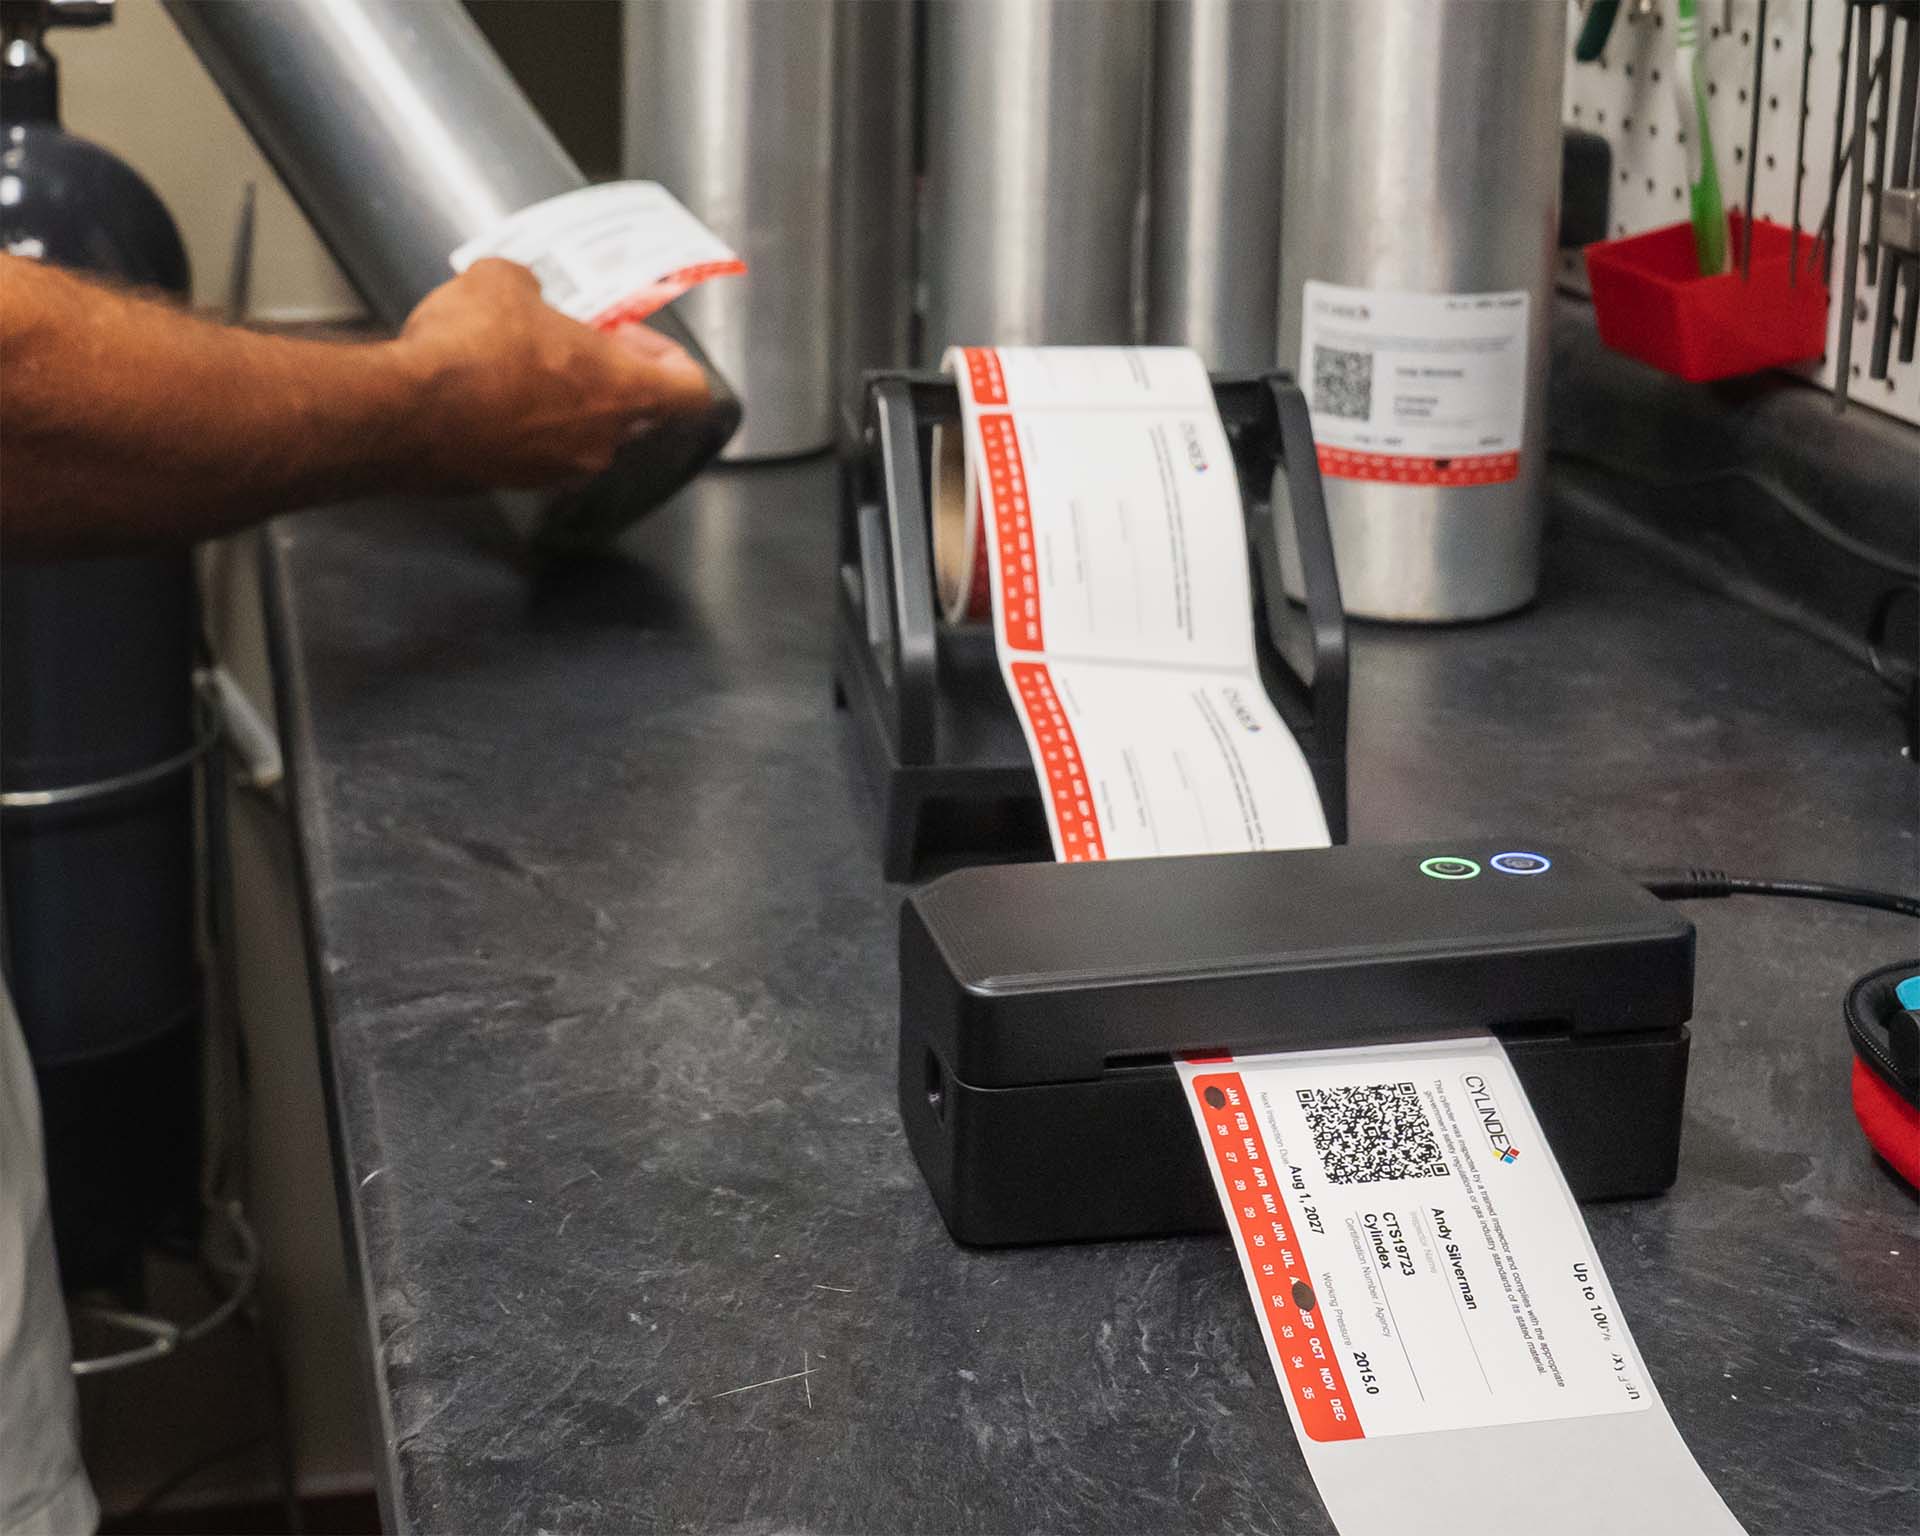
How to Connect Cylindex Visual Inspection App to The SVANTTO Bluetooth Thermal Label Printer
Pairing Your Device & Thermal Label Printer
1. Once you have acquired your printer, take it out of the box, read the manufacturer literature, and then connect it to power.
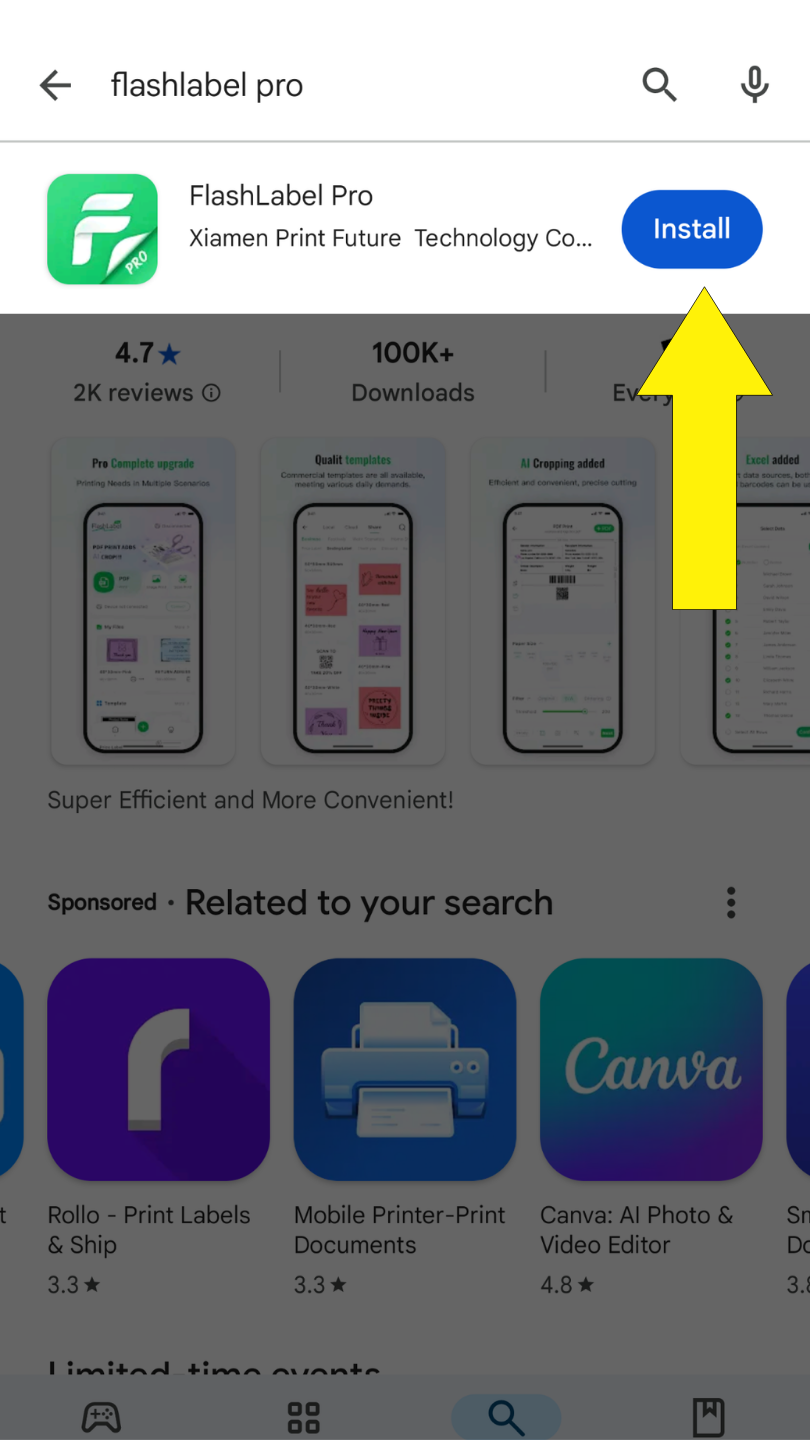
2. To connect the Cylindex Visual Inspection App to the thermal label printer, begin by installing “Flashlabel Pro” from the App Store or Google Play Store onto your mobile device or tablet.
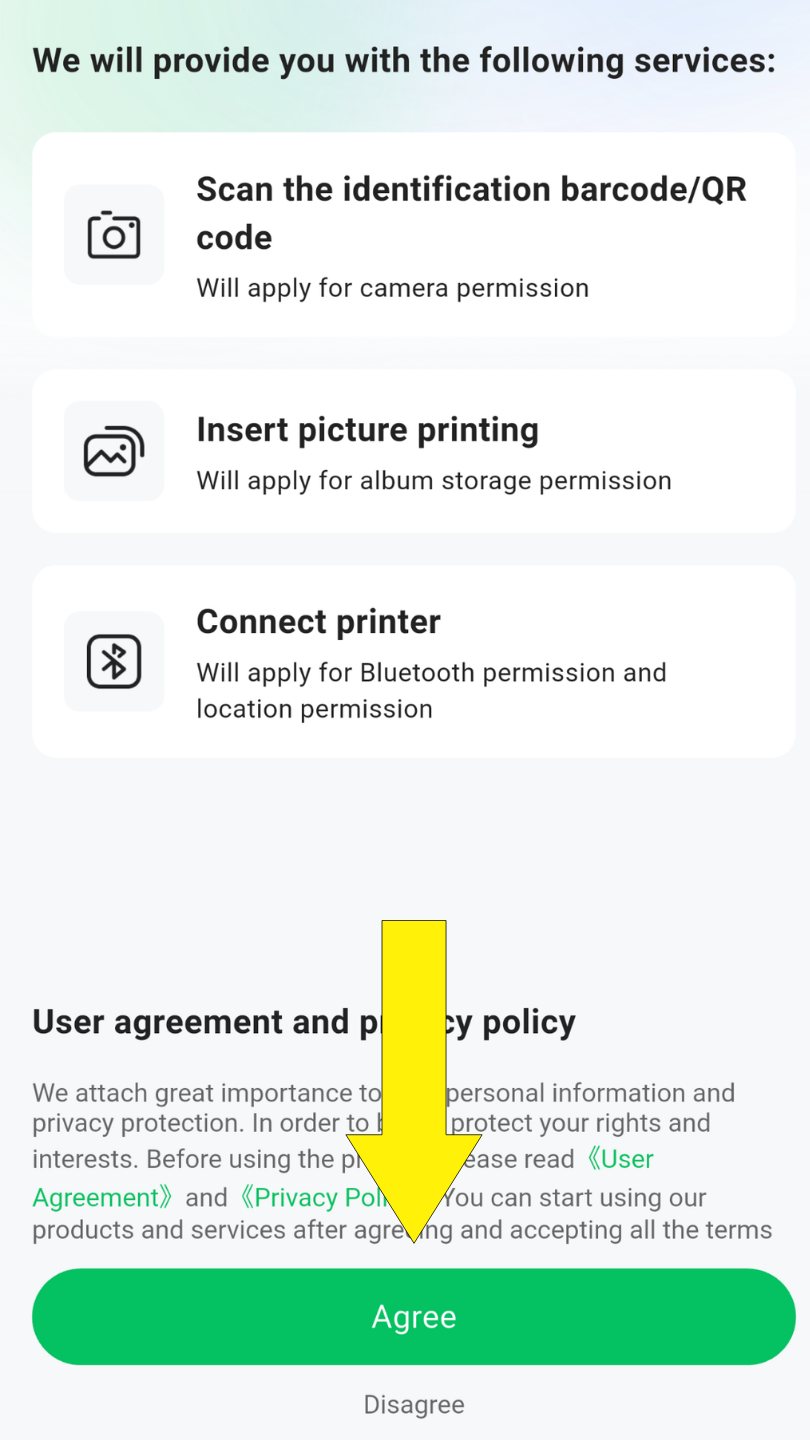
3. Once installed, open Flash Label Pro and complete the user agreement and privacy policy requirements.
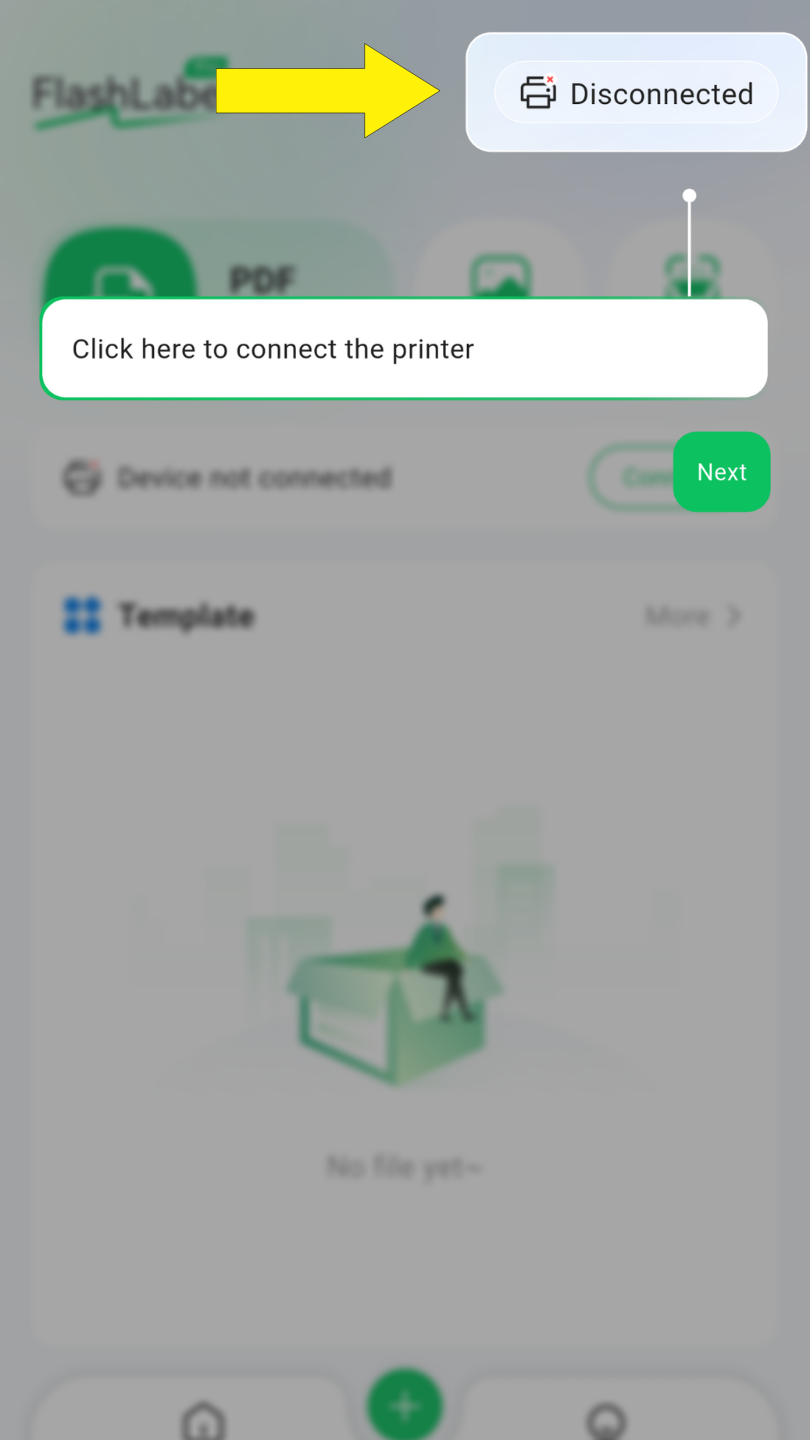
4. Next, click the “disconnected” button in the top right of your device. This is where you will begin the process of connecting your phone, via Bluetooth, to the thermal label printer.
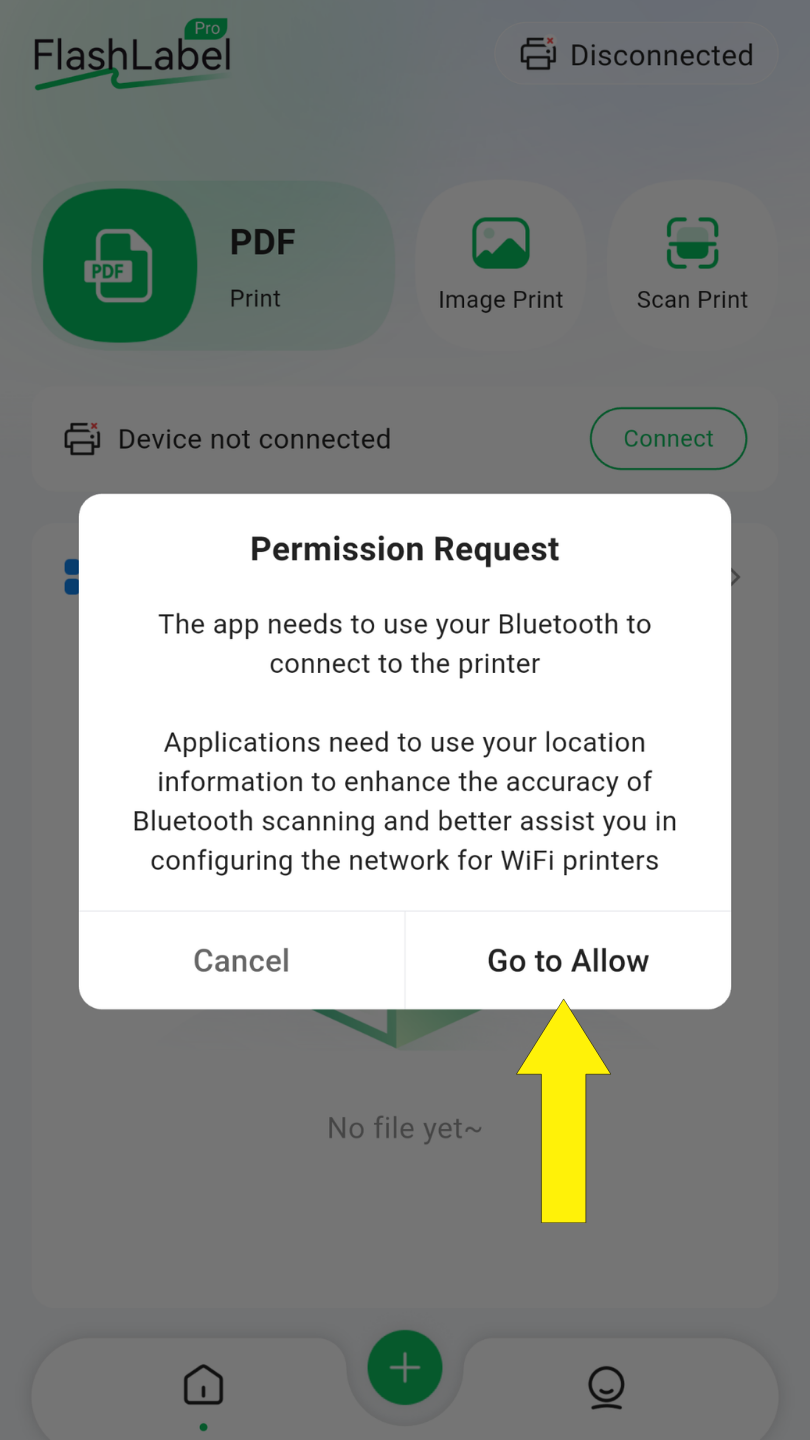
5. Allow Bluetooth permissions to your device.
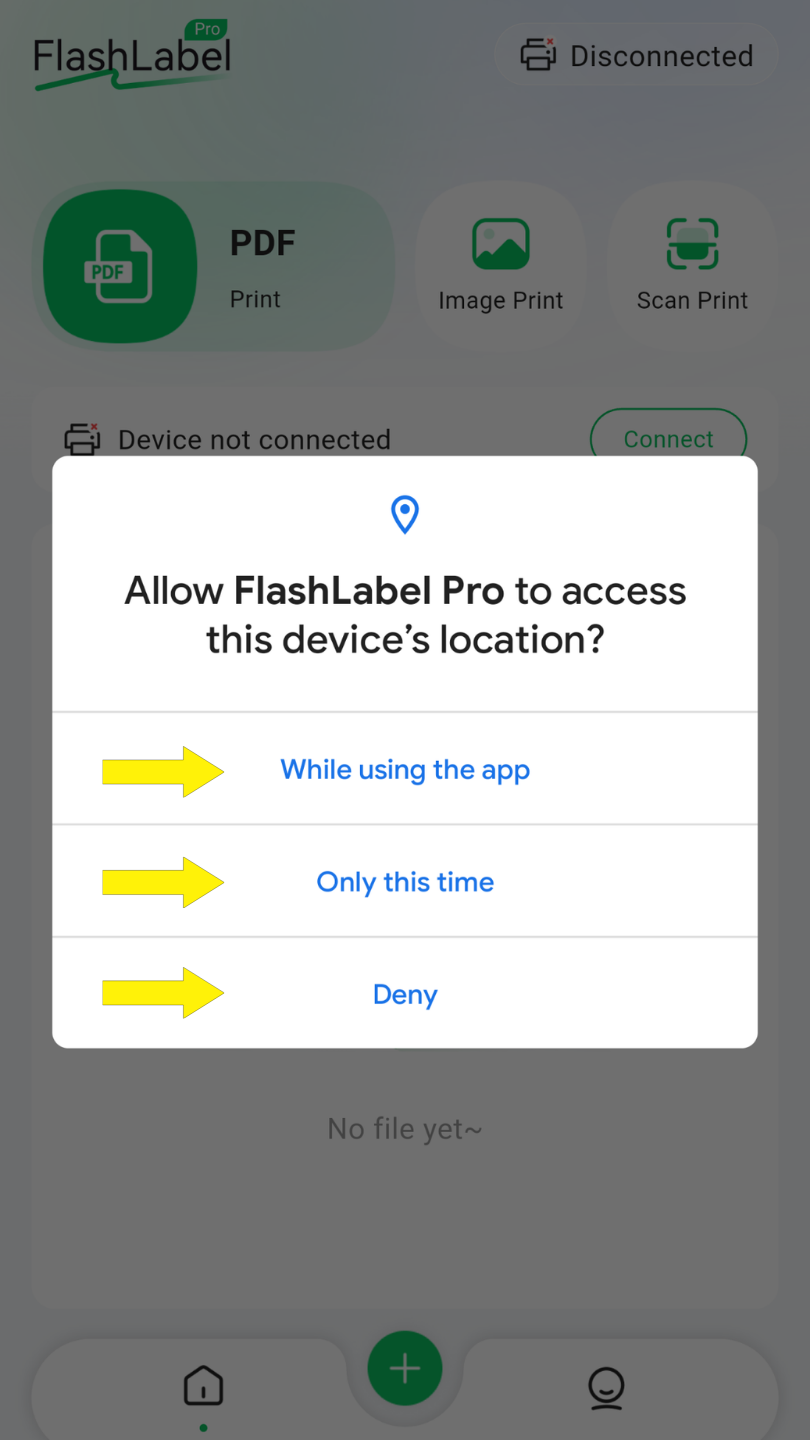
6. Select your preferred option for location service.
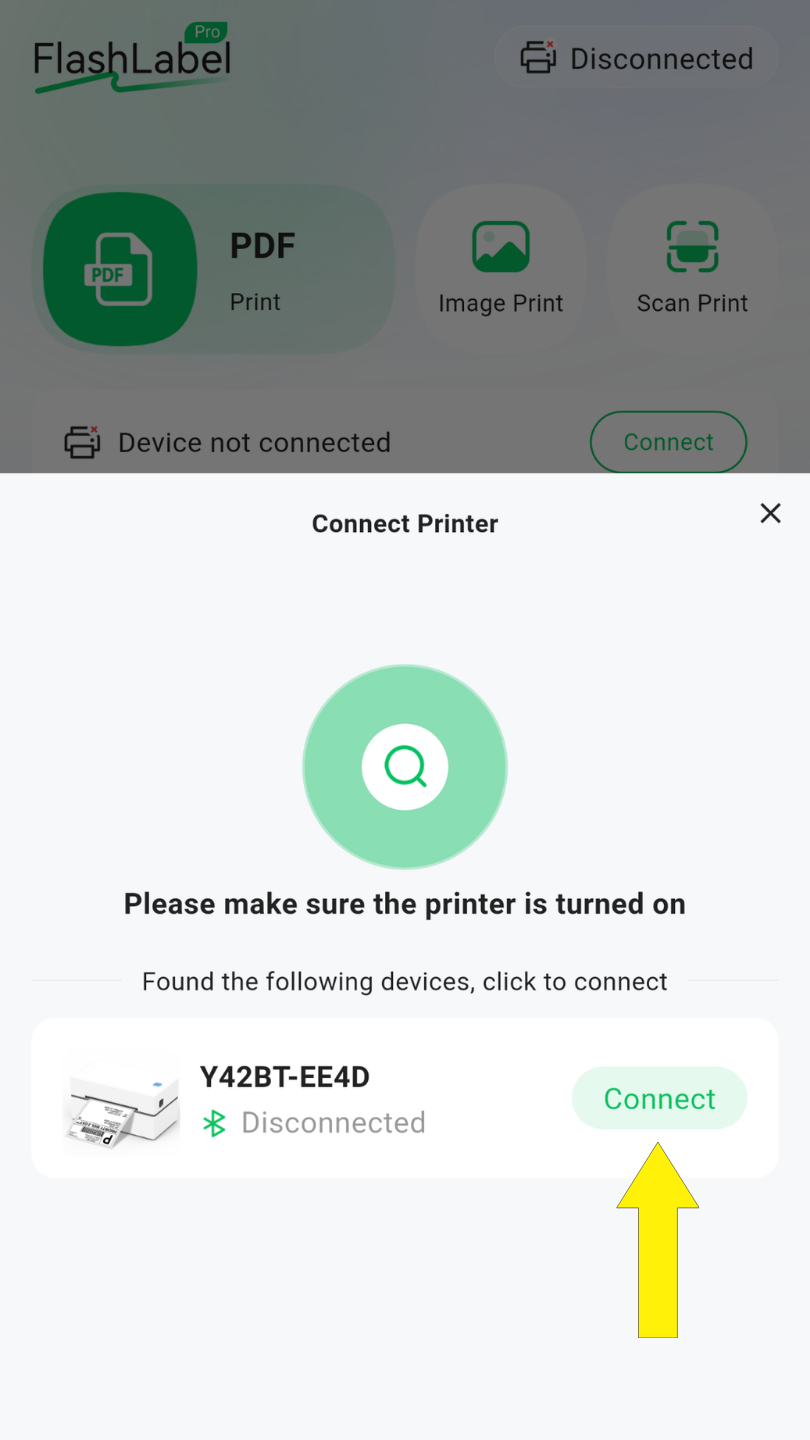
7. A list of available devices will populate including your thermal label printer. Select “connect” next to your printer. (If you do not see your printer on the list, ensure it is powered on.)
8. Confirm Bluetooth pairing.
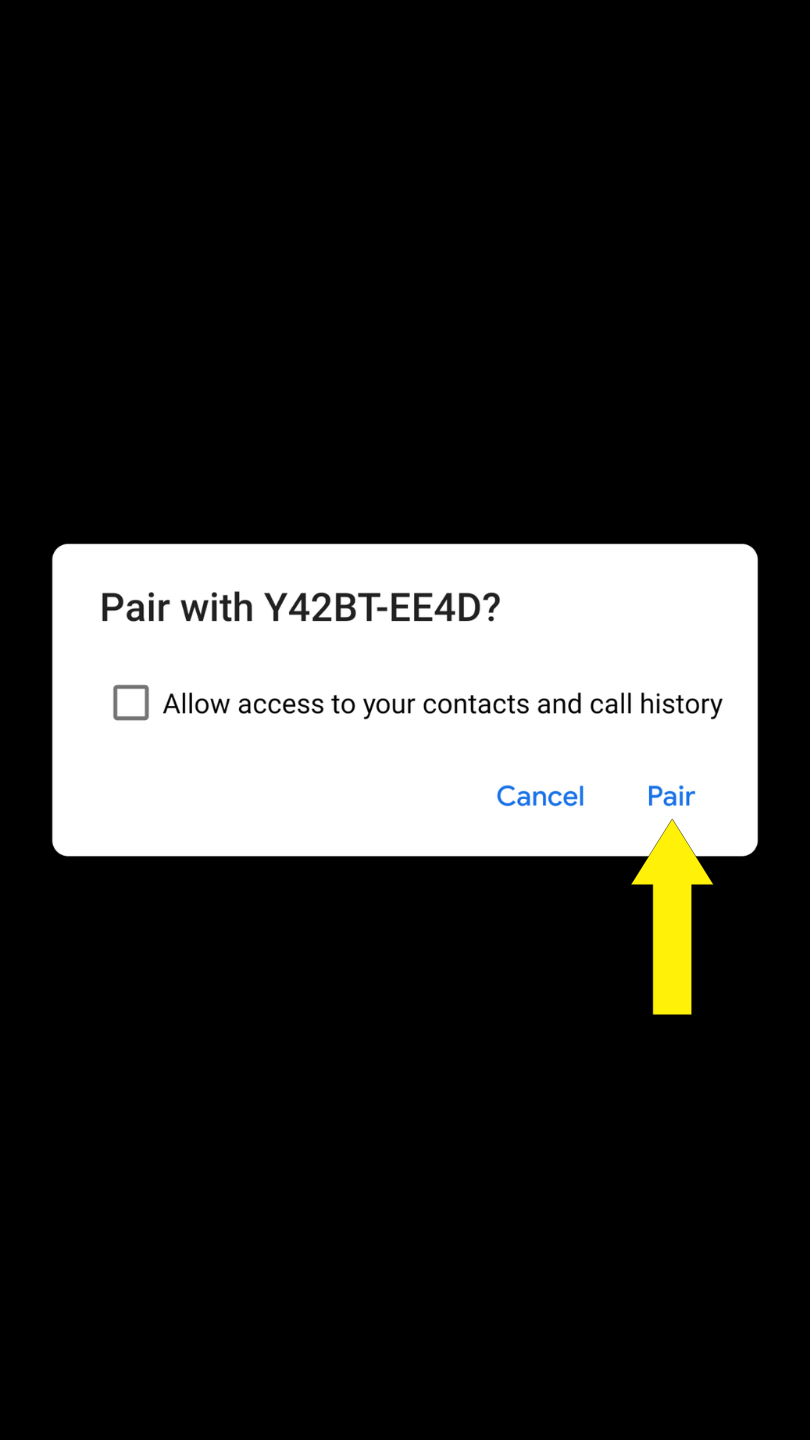
Setting Up the Printer for Cylindex Visual Inspection Thermal Label Stickers
9. After connecting to the printer via Bluetooth, you will be prompted to begin setup. Begin by selecting “gap” in the paper type field.
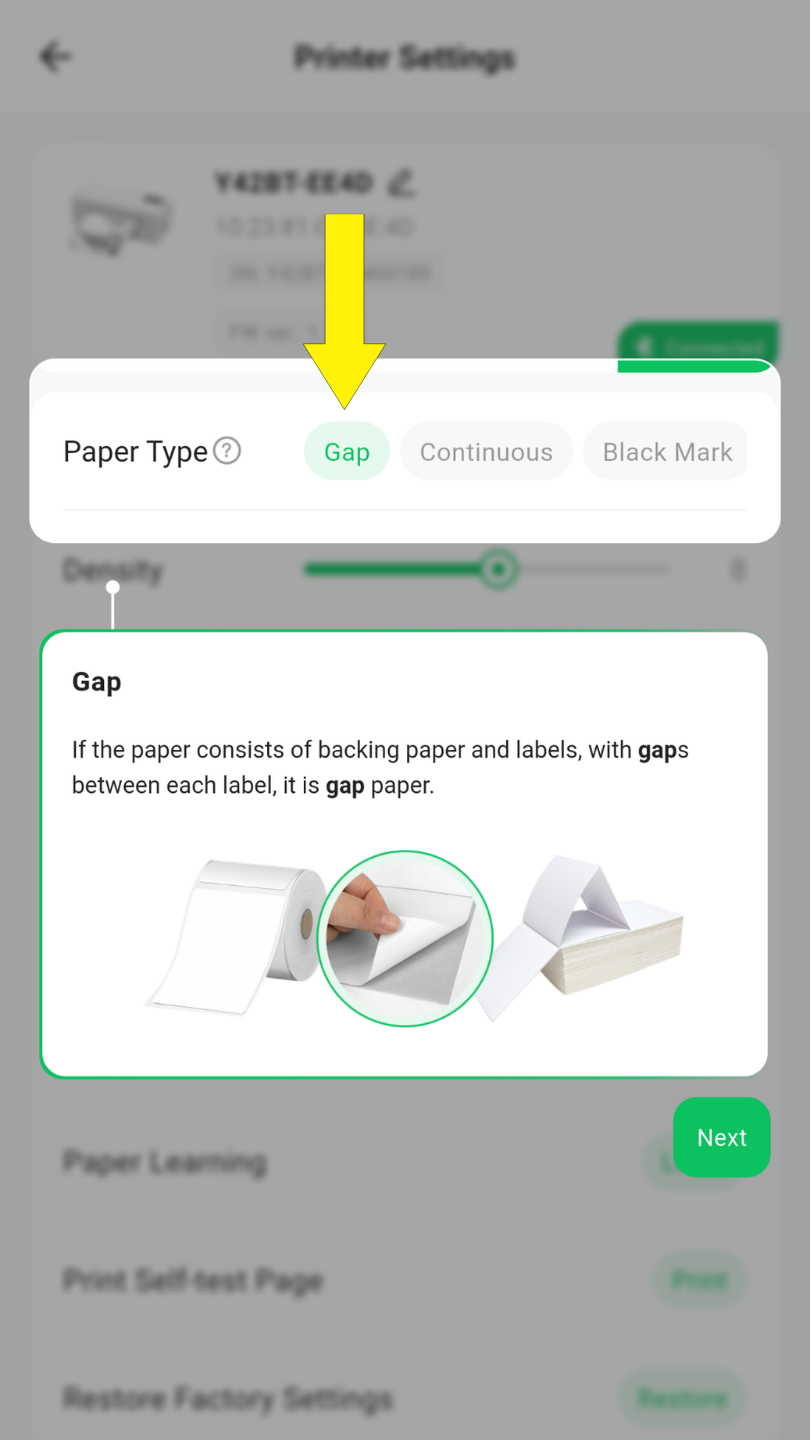
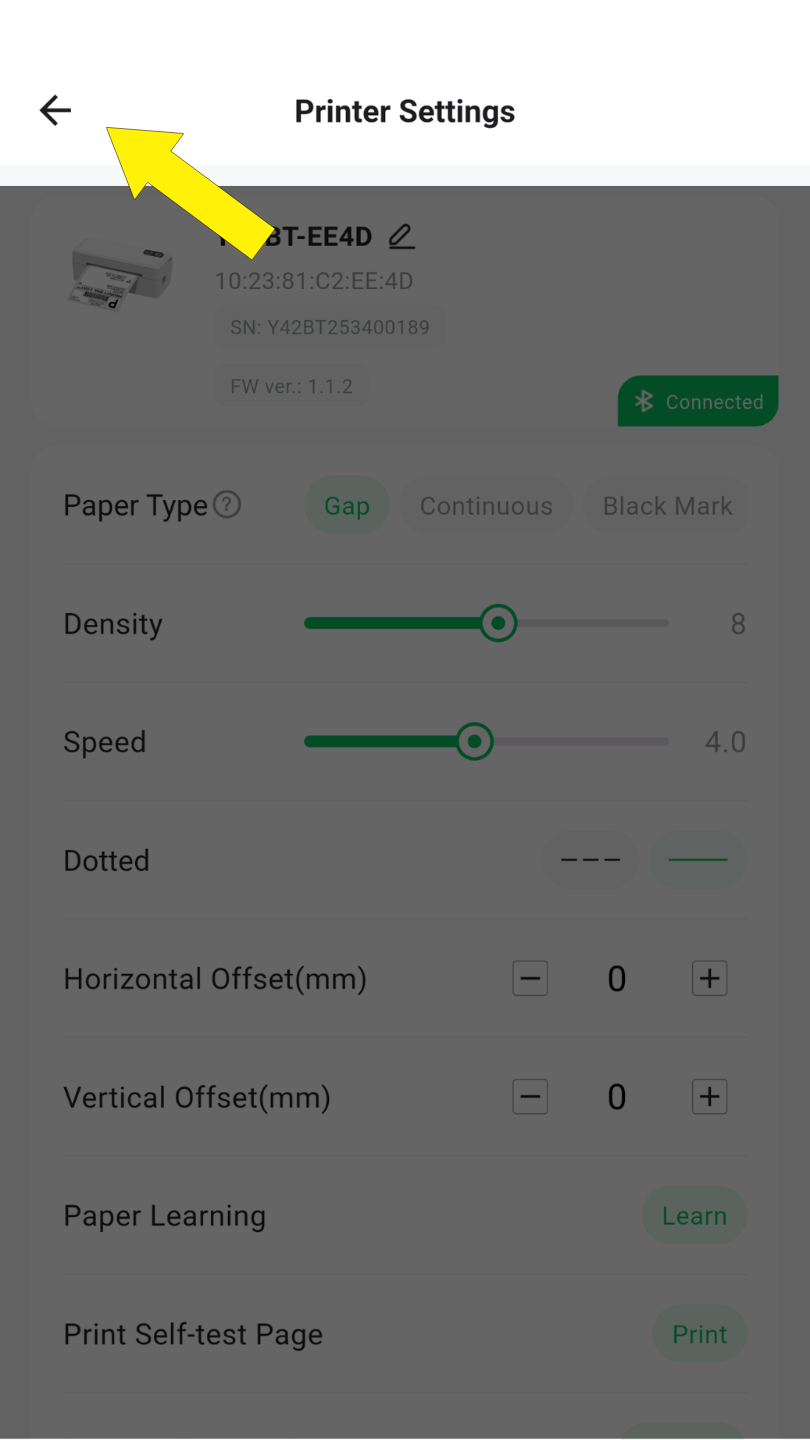
10. All other settings in this menu are correct by default. Exit printer menu.
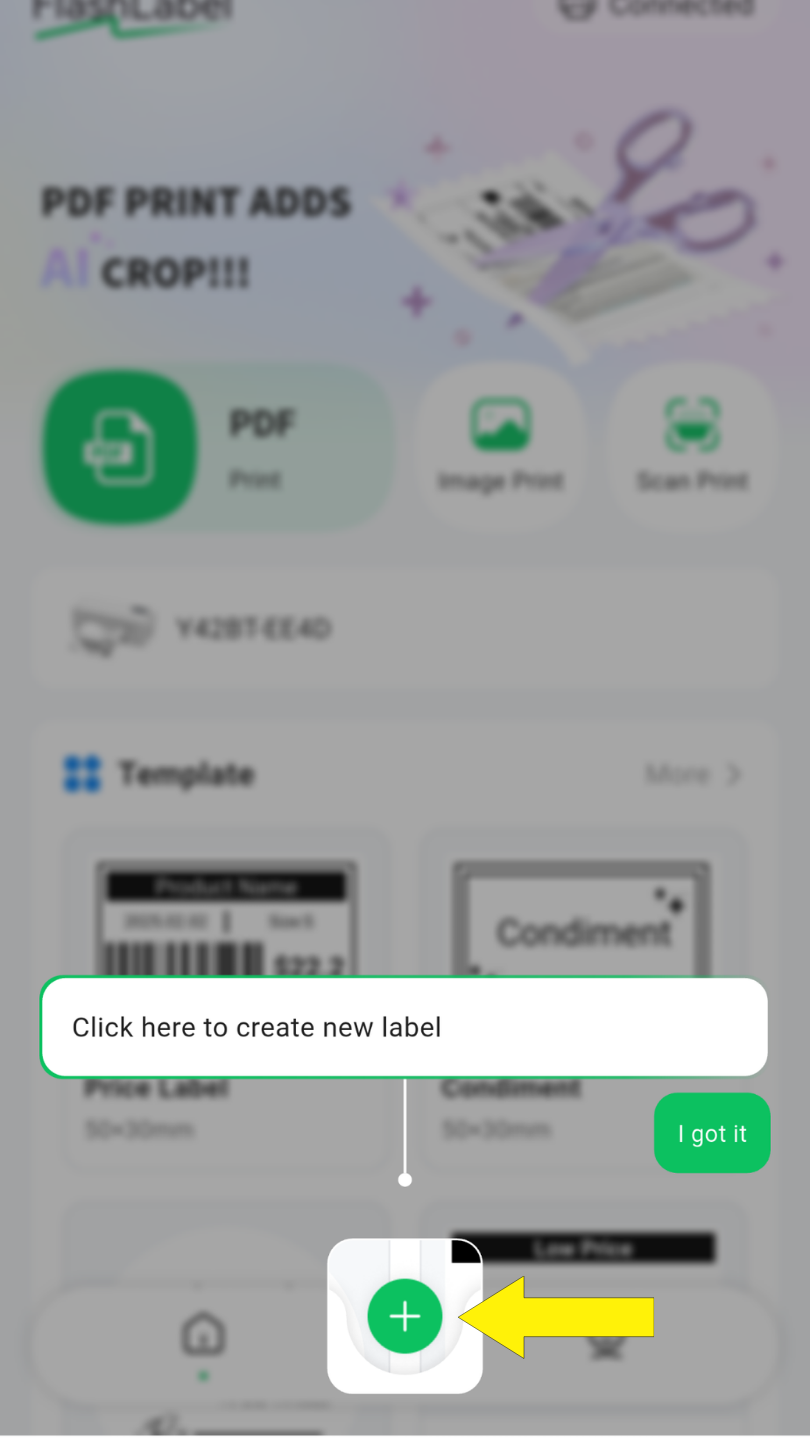
11. Select the “+” at the bottom of the app screen to create a new label. The label created following these instructions will be specific to the Cylindex Visual Inspection Thermal Label Stickers.
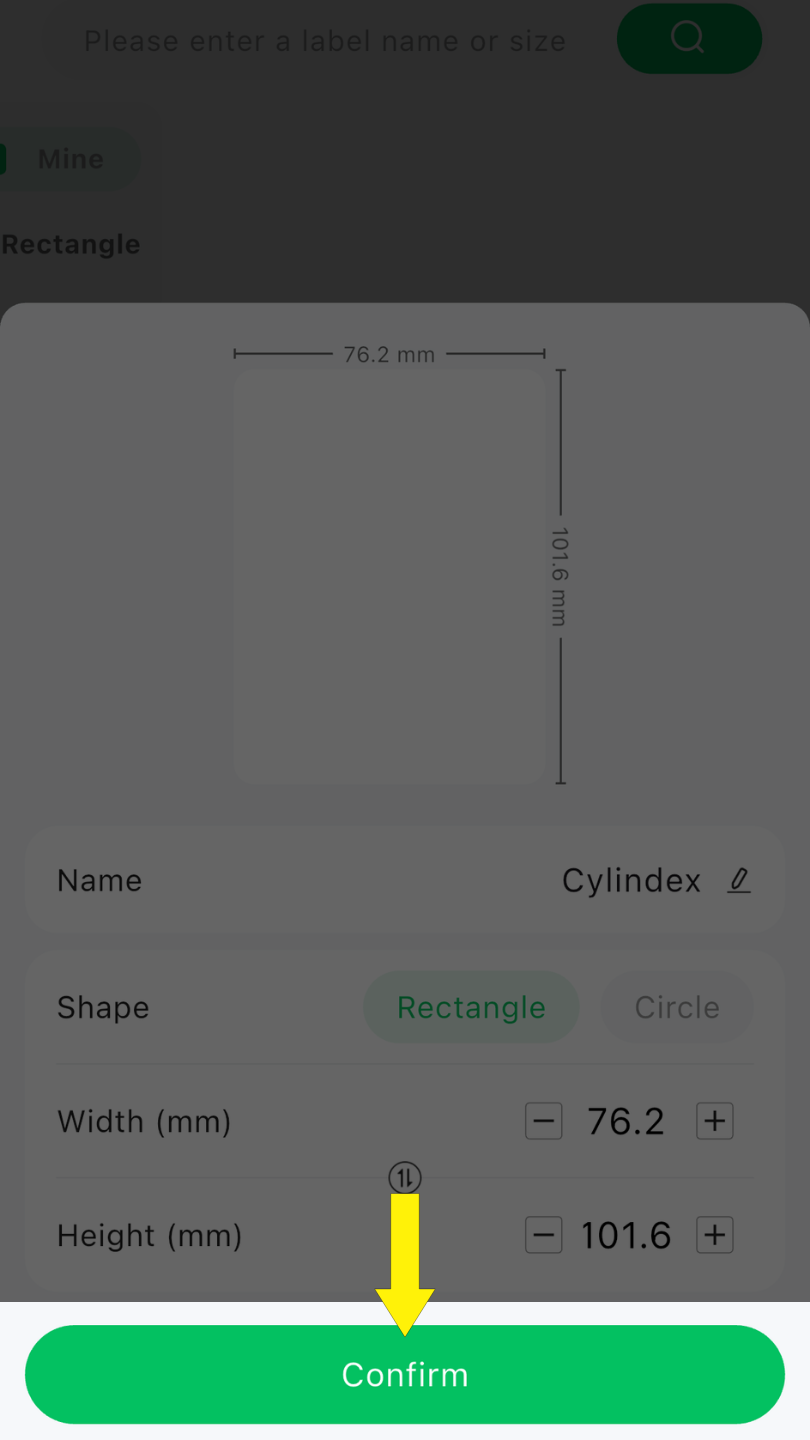
12. Rename the label to “Cylindex.”
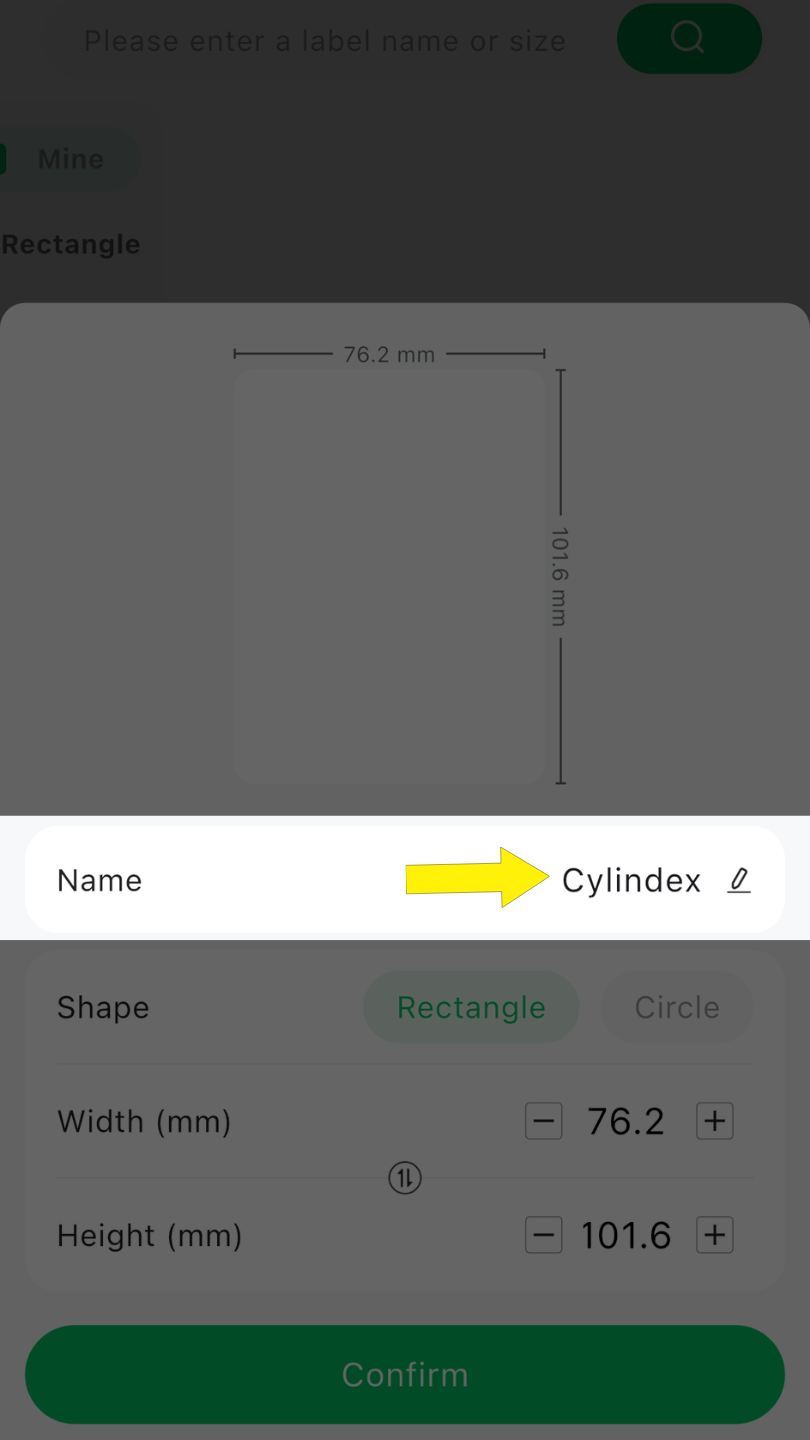
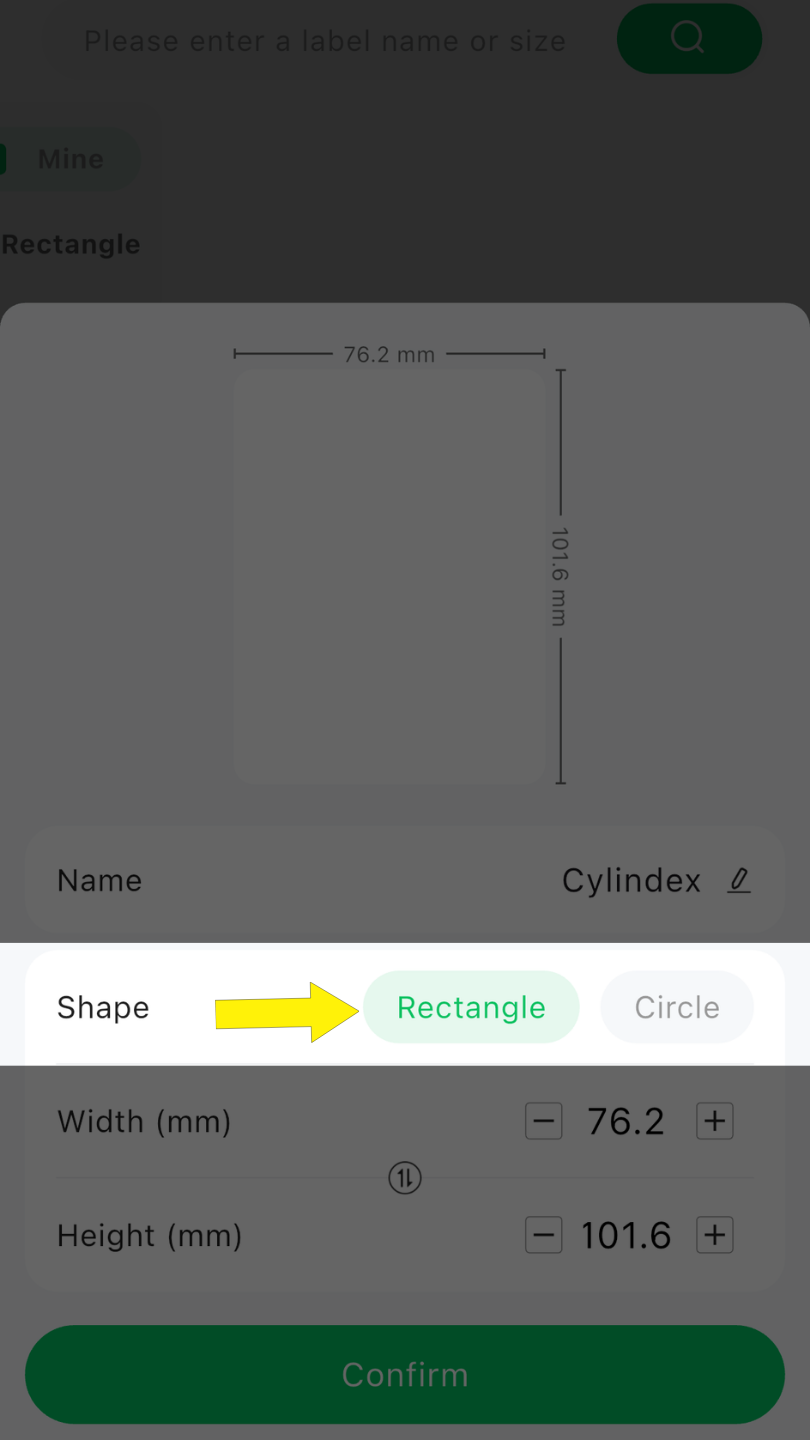
13. For shape, select “Rectangle.”
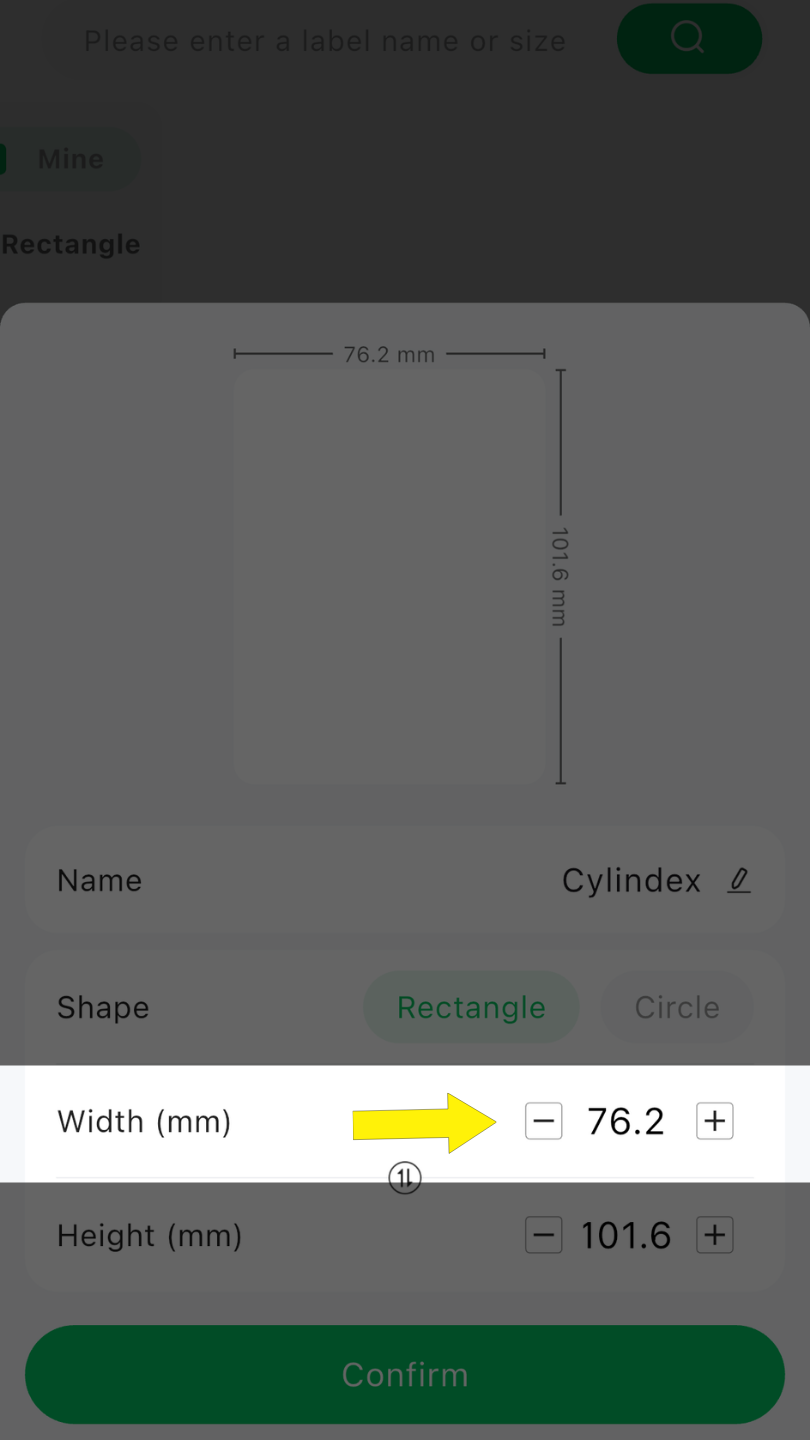
14. Adjust width to be “76.2”
15. Adjust width to be “101.6”
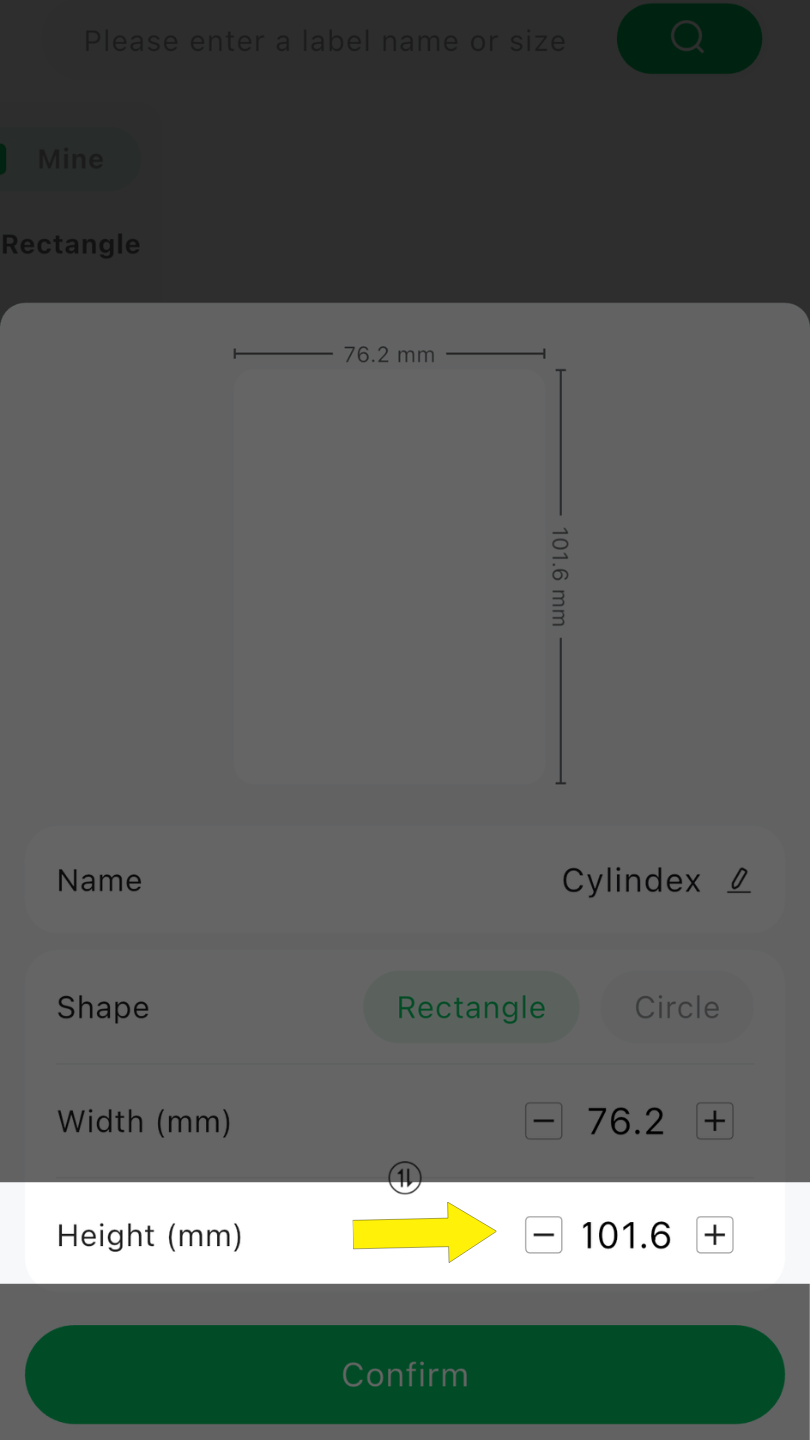
16. Click “Confirm” to save the label template. This is the label you will select whenever printing Cylindex Visual Inspection Thermal Label Stickers.
Printing Visual Inspection Thermal Label Stickers
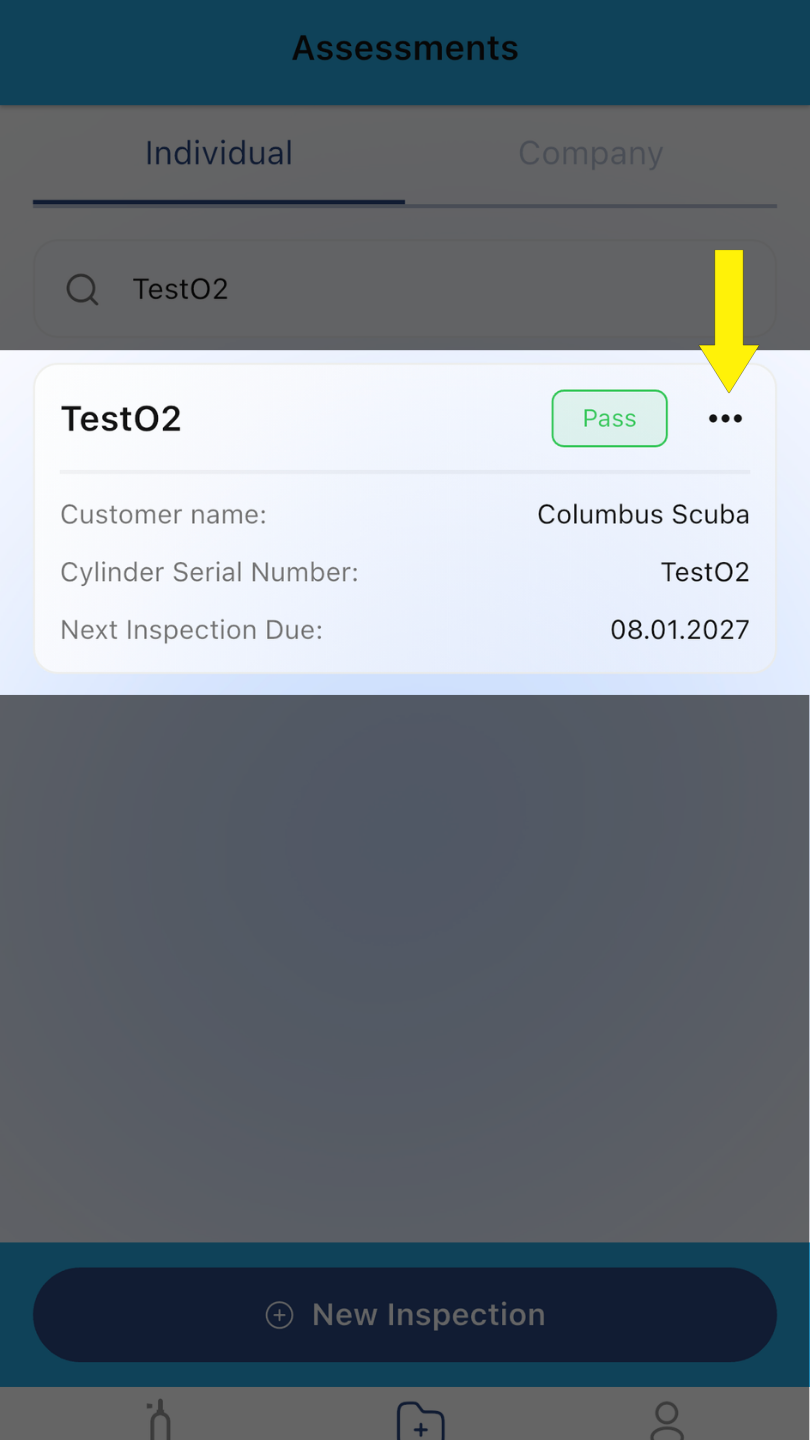
17. To print a visual inspection sticker, we will start by selecting an Assessment within the Cylindex Visual Inspection app. Click the “…” on the desired inspection.
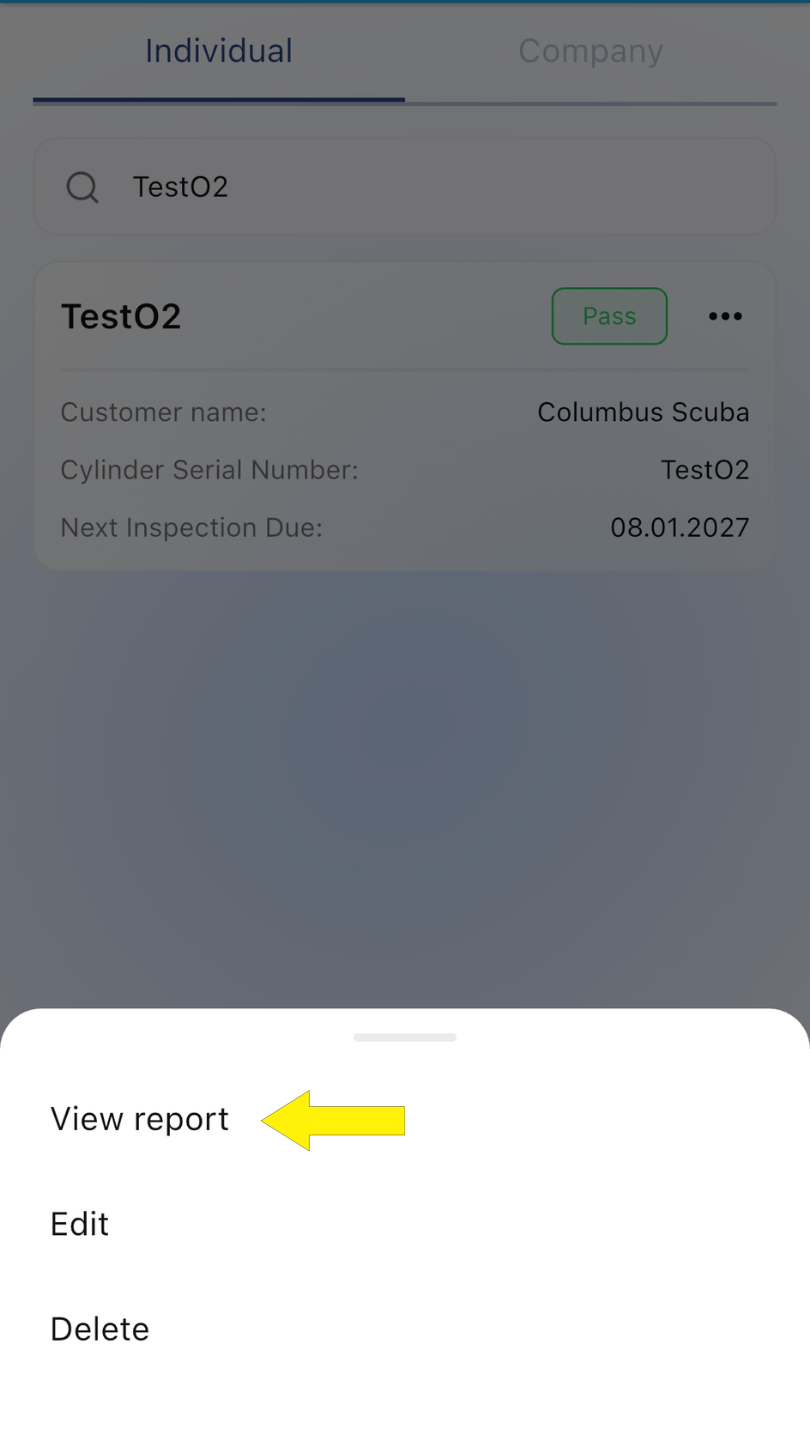
18. Next, click “View Report.”
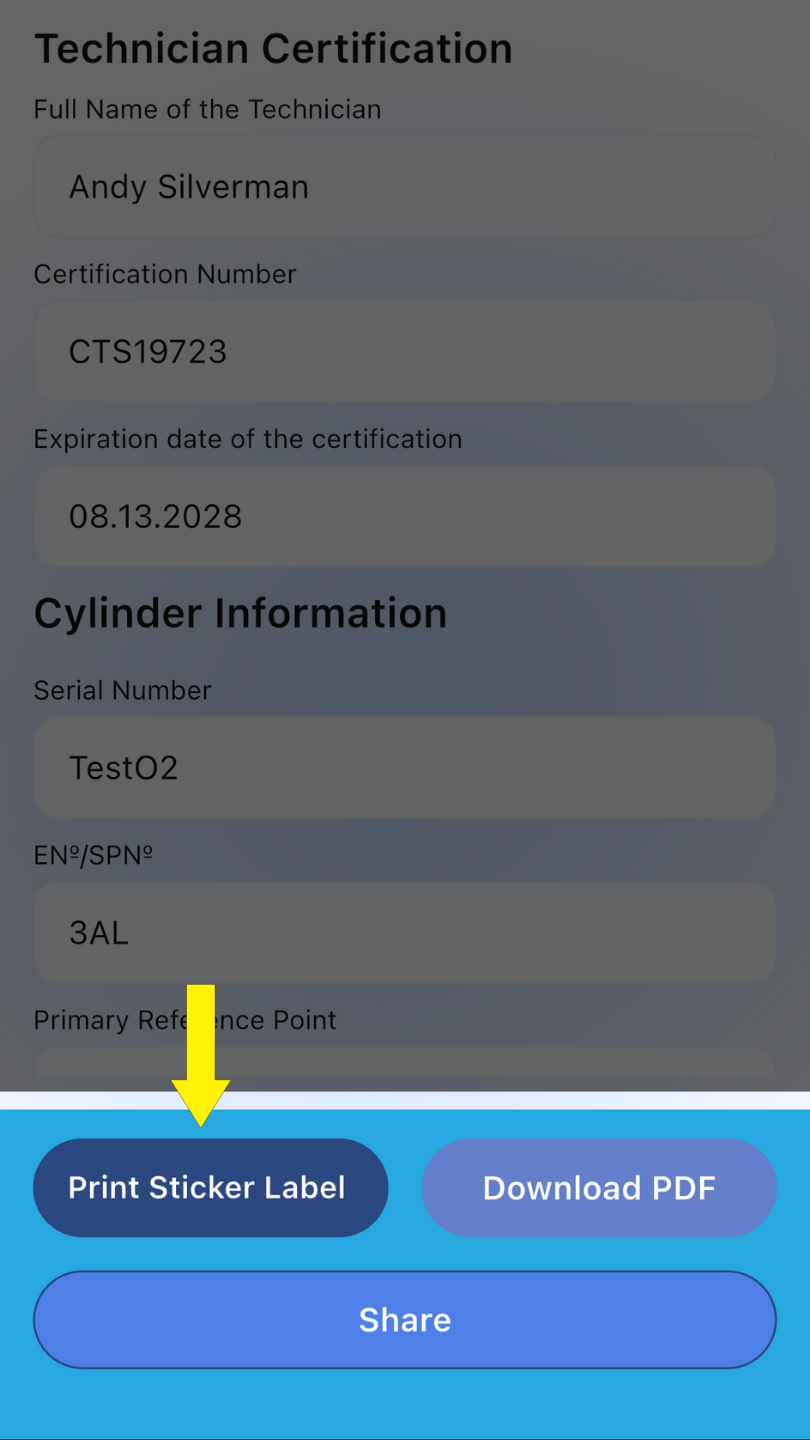
19. On the Assessment Report screen, select “Print Sticker Label”
20. The app will generate a label. Select the “share” symbol.
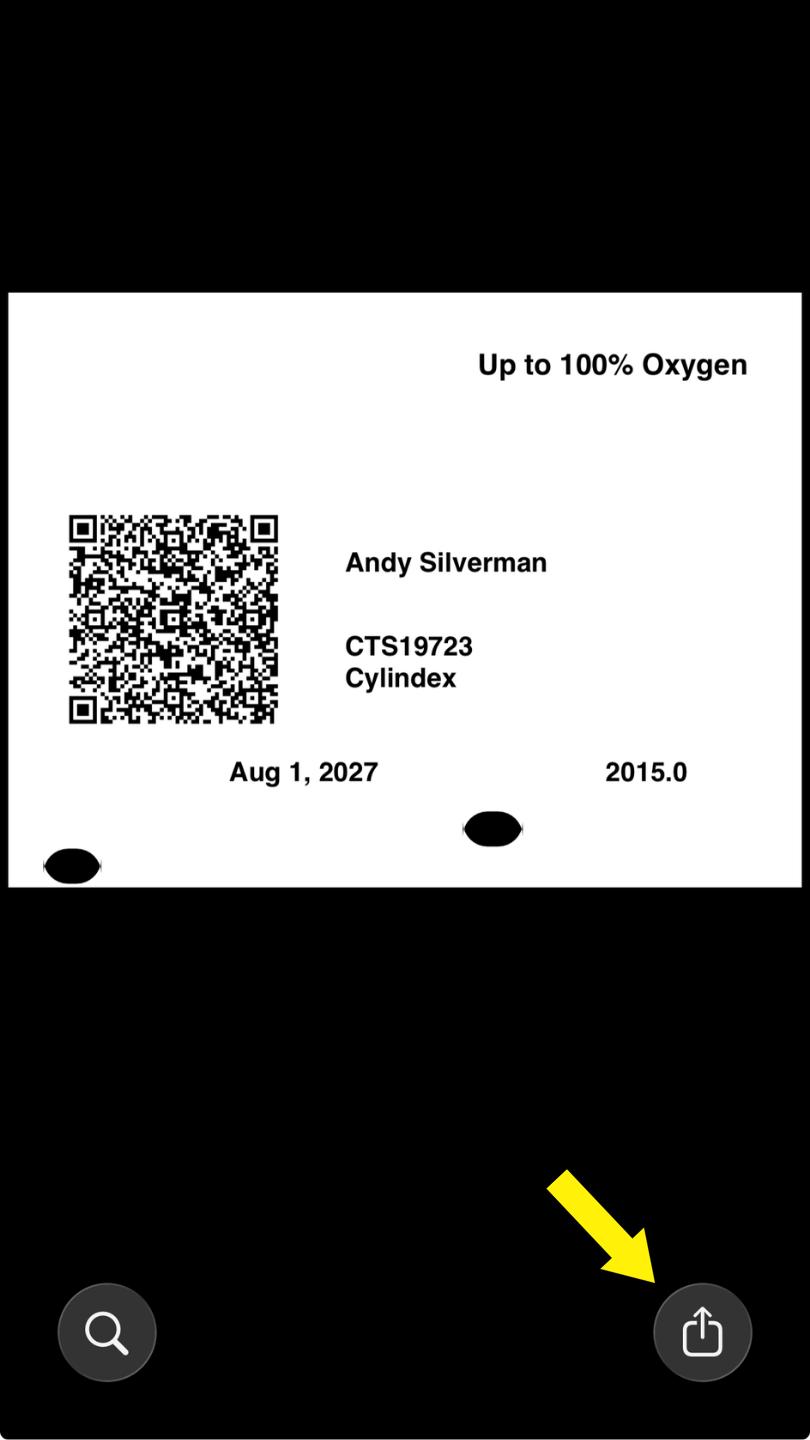
21. From the options for sharing the label, look for “Print with Flash Label Pro” and select it.
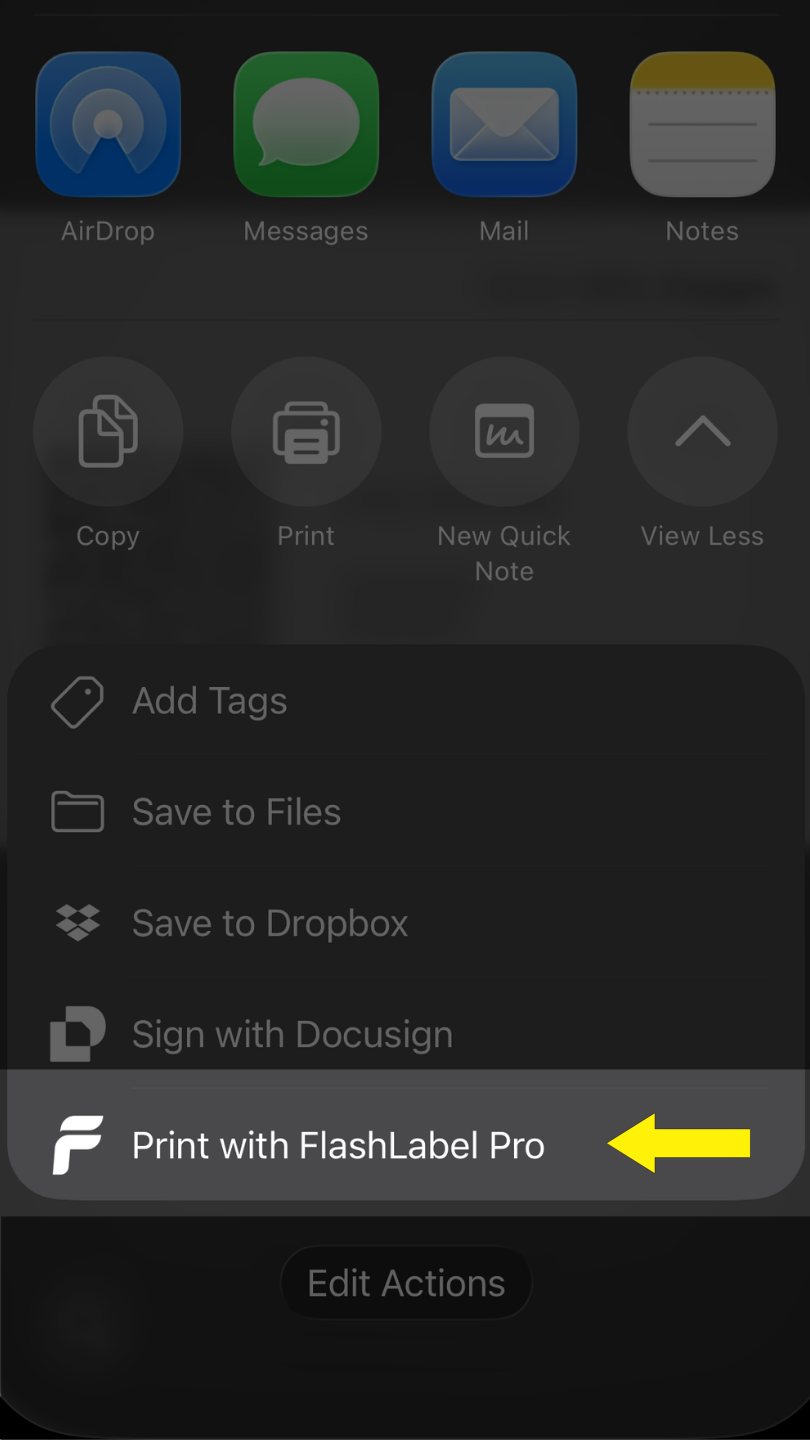
22. You will be brought to the Flash Label Pro app. From here, select the label you designed from the menu.
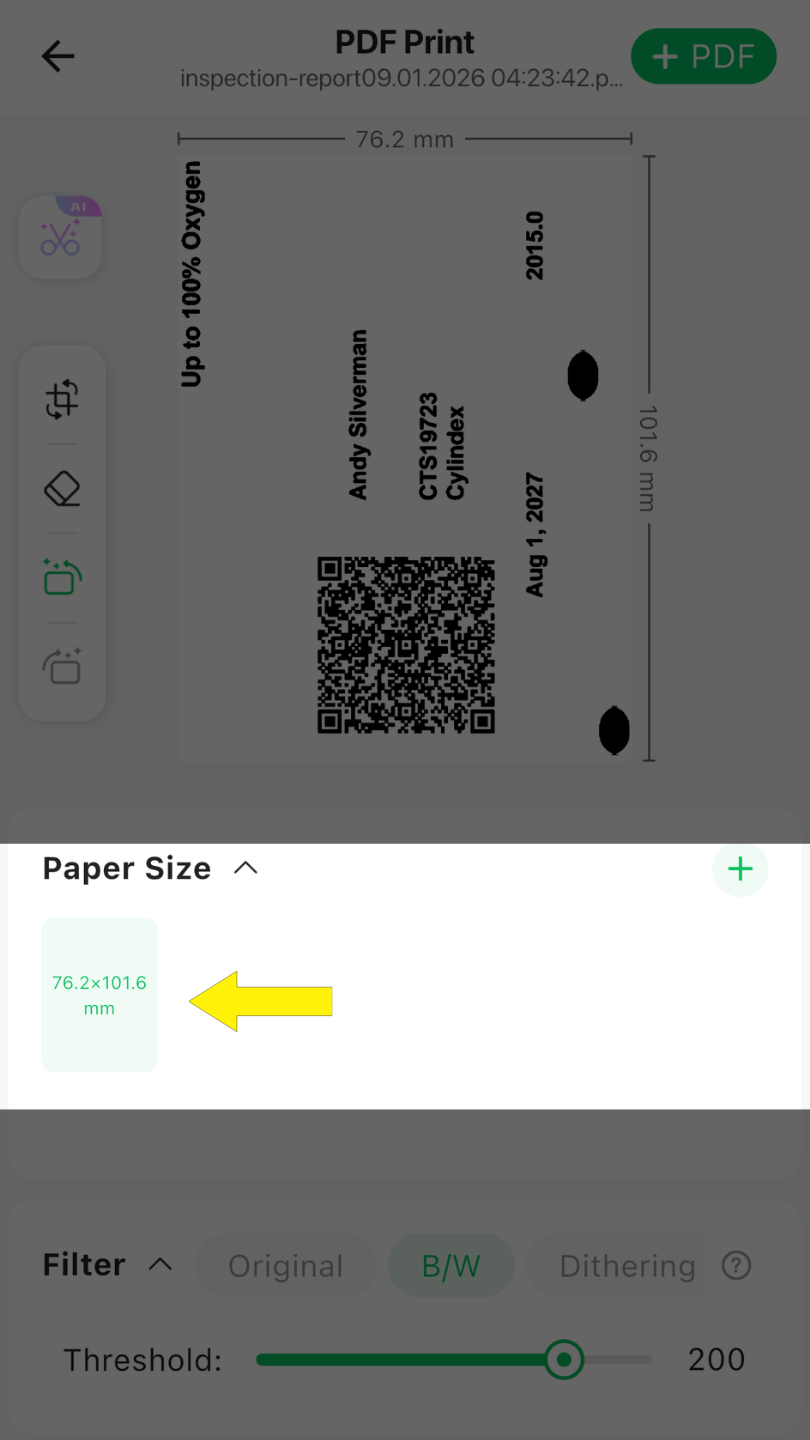
23. All other settings are correct by default. Select “Next” in the bottom right of the screen.
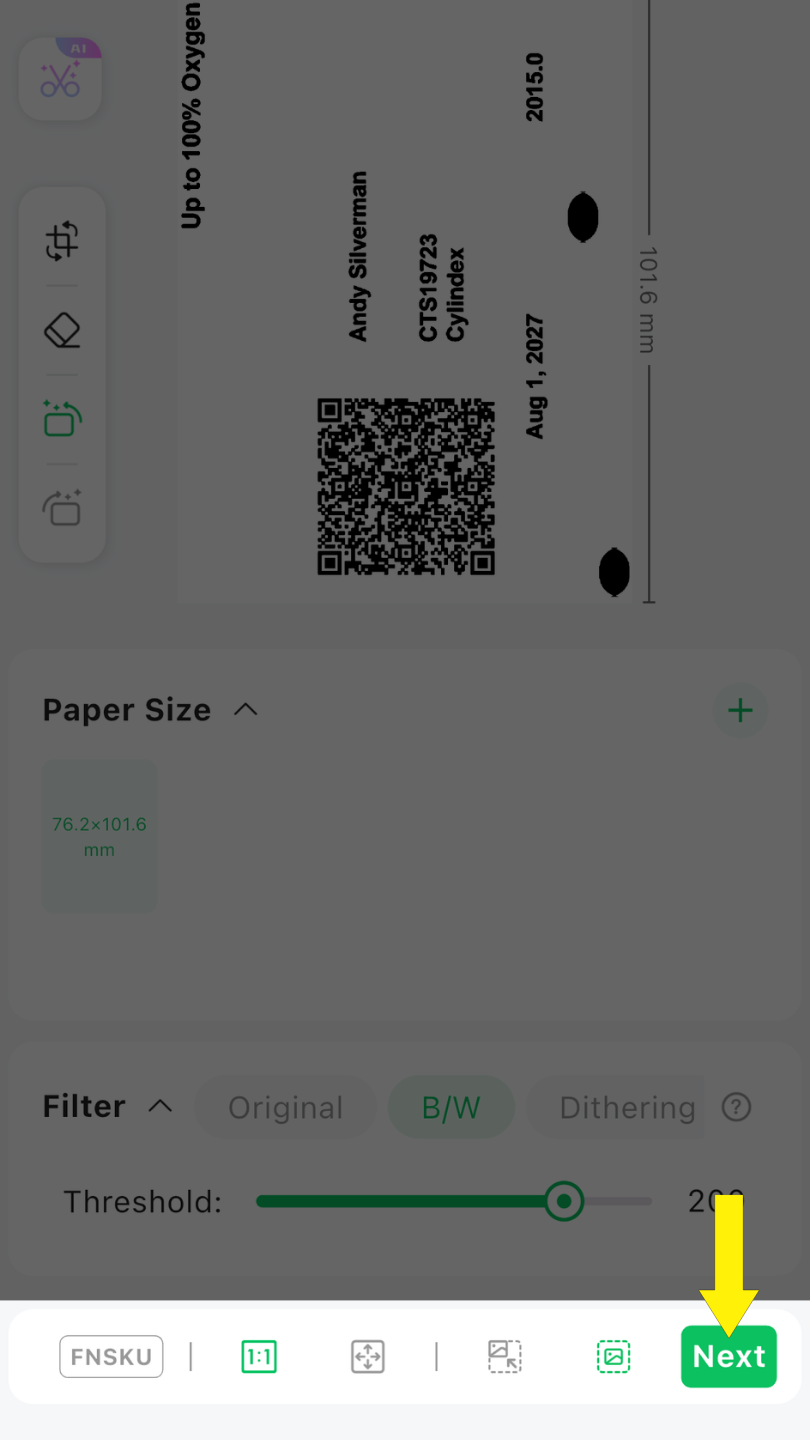
24. Confirm your device is connected to the printer. If you are not, select the “disconnected” button in the top right of the screen and follow the prompts.
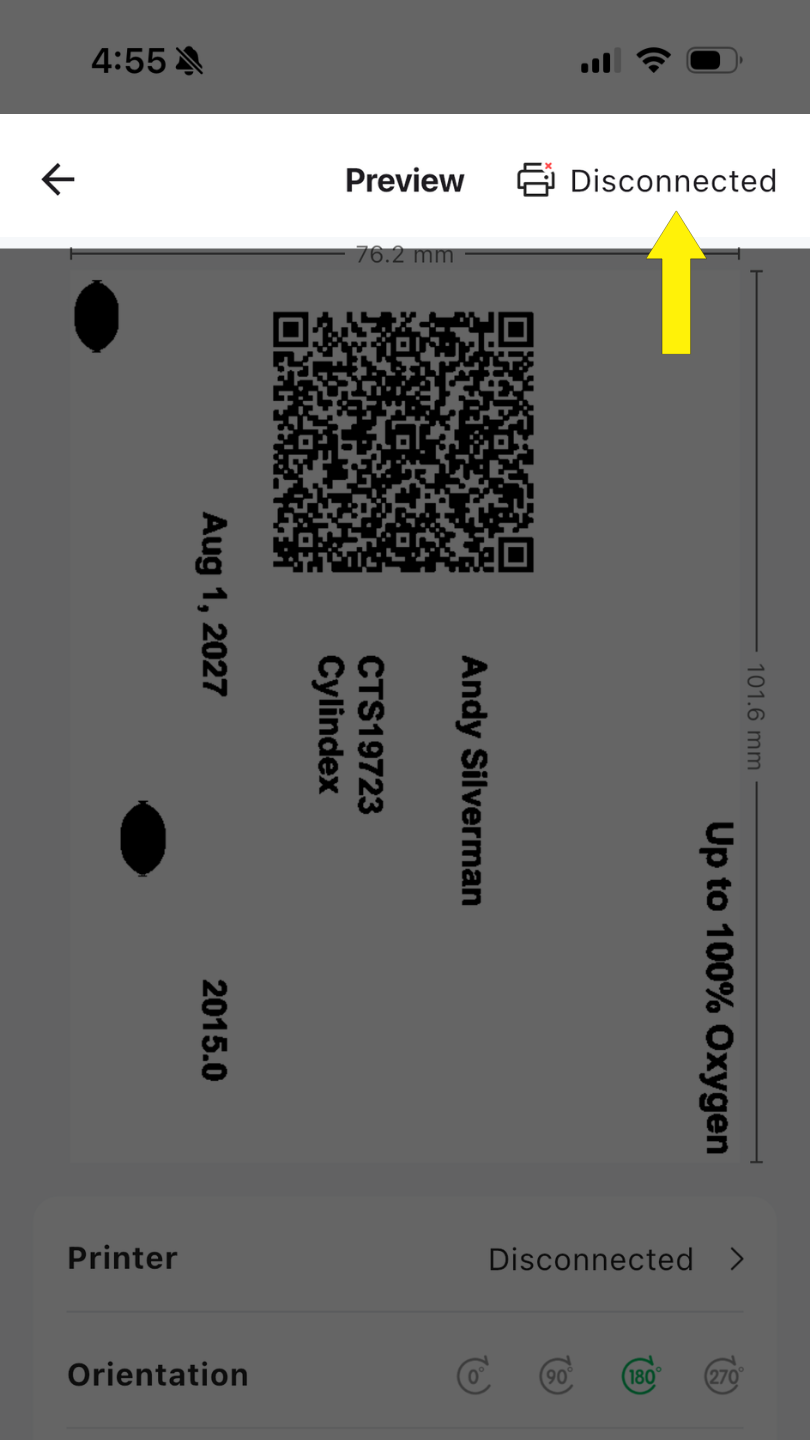
25. Once you have confirmed your device is connected to the printer, select the orientation to be “rotate 180°.” This setting only needs to be selected for the first label printed. The printer will remember this setting between uses.
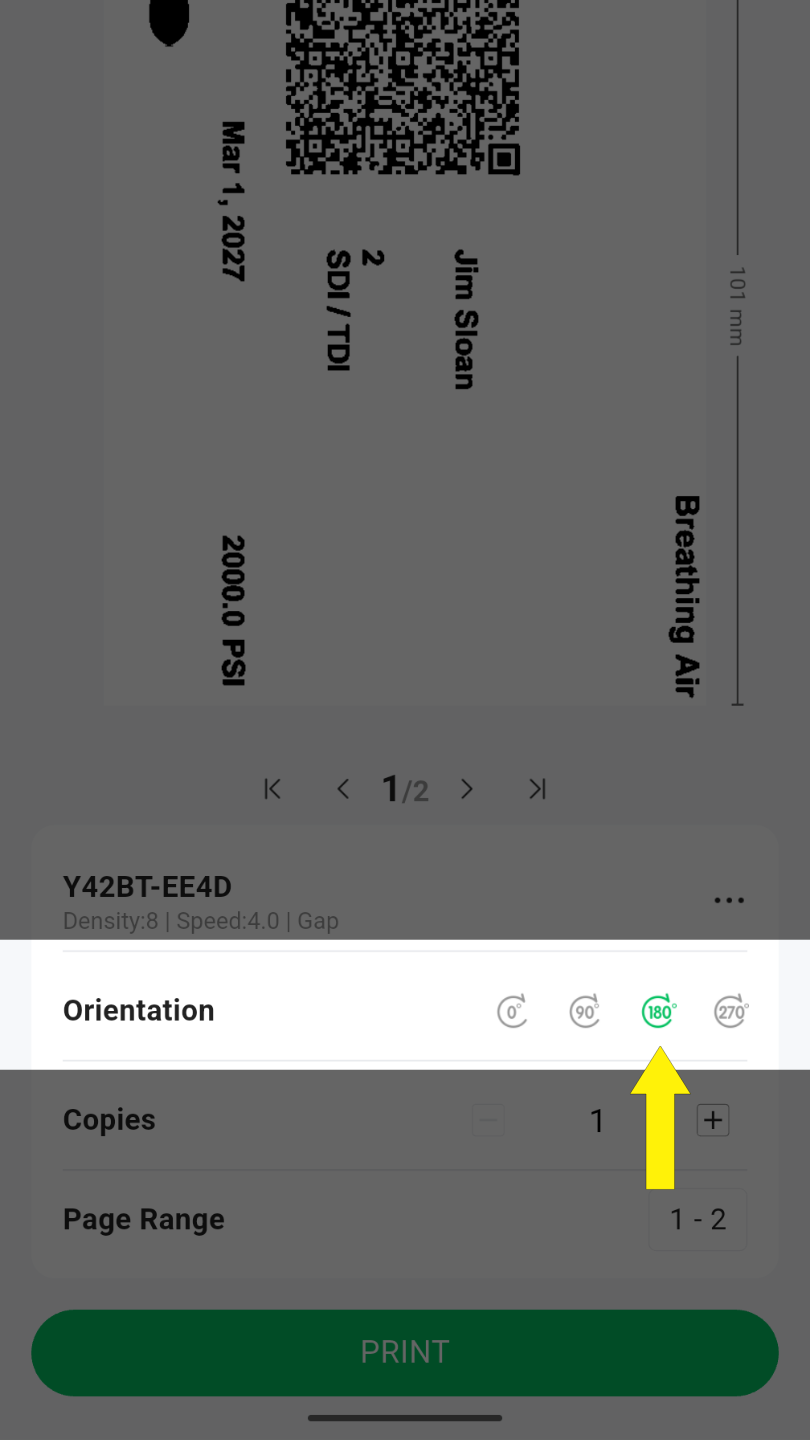
26. Finally, select “PRINT.” Your label will print and be ready to apply to the cylinder that has been visually inspected.